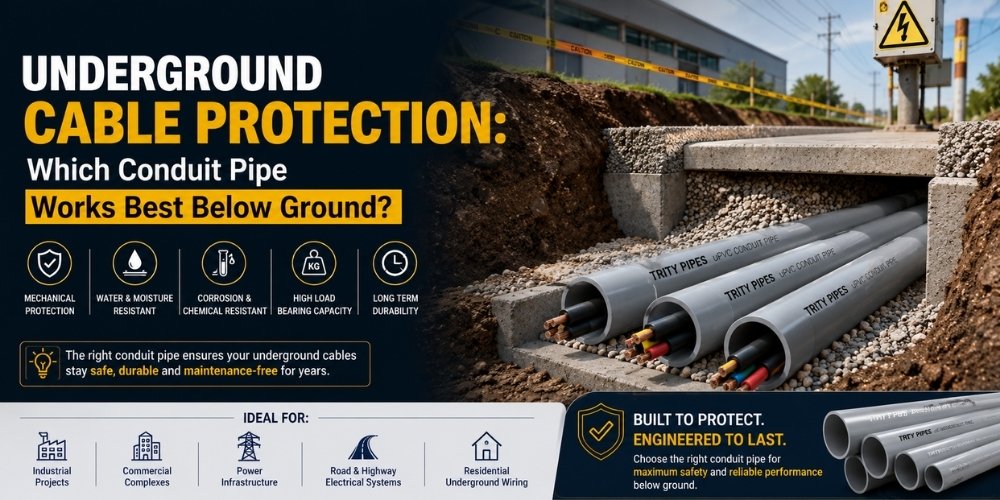
Underground cable runs get one shot at being done right. Once a trench is backfilled, a road is resurfaced, or a slab is poured over it, fixing a mistake in the conduit means digging up finished work, which on an infrastructure or township project can mean weeks of delay and a cost line nobody budgeted for.
That's what makes underground conduit specification different from every other part of an electrical BOQ. There's no second inspection once it's covered. Civil contractors, infrastructure project managers, and solar EPC teams working across India need to get the material, depth, bedding, and sealing right the first time, because the ground itself becomes the enemy the moment installation is done badly: soil pressure, moisture ingress, rodents, and years of vehicle load from above all work against a conduit that wasn't specified for burial.
Soil Pressure and Load-Bearing Requirements
Buried conduit doesn't just carry cables, it carries the weight of everything above it: backfill soil, compaction loads during installation, and in many cases vehicle traffic once the surface is restored. A conduit that's structurally fine for a wall chase can crush or deform once it's under a metre of compacted soil.
This is why wall thickness, not just outer diameter, is the number that matters underground. Within the IS 9537 Part 3 classification system, Heavy Mechanical Stress (HMS) grade uPVC conduit is engineered specifically for this kind of load, encasement in concrete, direct burial, and installations where the pipe has to survive compaction without deforming. Using MMS or LMS grade for underground runs to save on material cost is one of the most common specification errors on Indian infrastructure sites, and it's rarely visible until the conduit has already been buried and something goes wrong. The grade differences and where each one applies are laid out in detail in the LMS vs MMS vs HMS conduit grade guide, which is worth checking against the project BOQ before ordering.
Soil type matters too. Loose or sandy soil transfers less direct load onto the pipe wall than compacted clay or areas subject to heavy vehicle loading above, and rocky ground introduces point-load risk from stones pressing directly against the conduit if bedding isn't done properly. Both conditions call for HMS grade and careful trench preparation, not a compromise on either.
Heavy-Duty uPVC vs HDPE for Underground Runs: When to Use Which
This is the decision infrastructure buyers get asked most often, and the honest answer depends on the installation method as much as the site conditions.
Heavy-duty (HMS) uPVC conduit is the right choice when:
- The installation is a standard open-trench dig with reasonably straight runs
- The route has multiple bends, junction points, or connects into panels and pull boxes at regular intervals
- Cost and local availability matter, since uPVC is widely stocked and easier to source in standard lengths across India
- The project needs socketed, jointed sections rather than continuous coiled pipe
HDPE conduit is the better fit when:
- The installation uses horizontal directional drilling (HDD) or trenchless methods, where continuous coiled lengths avoid the joints a rigid pipe would need
- The route has to navigate curves, obstacles, or elevation changes that rigid uPVC can't accommodate without excess fittings
- The run is very long and minimising the number of joints matters more than the wall rigidity of the pipe
In practice, most Indian infrastructure and township projects end up specifying both across a route: HMS uPVC for the majority of the straight, trenched sections and shorter connections into pull pits and panels, with HDPE reserved specifically for directional drilling stretches and long uninterrupted runs where flexibility outweighs rigidity. Specifying one material for an entire project regardless of installation method usually means paying for flexibility you don't need on 90% of the route, or forcing a rigid pipe through a drilling method it wasn't designed for.
Trench Preparation: Bedding, Sand Cushion, and Cover Slab
Conduit failure below ground is rarely about the pipe itself. It's almost always about what was, or wasn't, done in the trench before the conduit went in.
Standard practice for underground power cable and conduit installation in India, following the principles laid out in IS 1255 (Code of Practice for Installation and Maintenance of Power Cables), follows a consistent sequence:
- Excavate a trench with a smooth, stone-free base. Sharp stones or debris left in the trench bottom create point-load stress on the conduit wall once backfill is compacted on top.
- Lay a sand bedding layer, typically around 75mm of fine, sifted sand free of sharp material, across the trench bottom before the conduit is placed. This cushions the pipe and prevents direct contact with harder subsoil.
- Place the conduit, keeping it as straight as the route allows and avoiding sharp bends. Where direction changes are unavoidable, use proper fittings rather than forcing the pipe into a tight radius.
- Cover with a further sand layer above the conduit before the main backfill goes in. This sand surround protects the pipe from the compaction loads of the backfill material itself.
- Add mechanical protection above the sand, commonly RCC cover slabs, protective tiles, or bricks, positioned to warn future excavation and physically shield the conduit from a spade or excavator bucket digging into the same alignment later.
- Lay a warning tape in the backfill above the protective layer, well before reaching finished ground level, so anyone digging in the area gets a clear signal before they reach the conduit itself.
- Backfill and compact in layers, watering and ramming as required, rather than dumping and compacting all the fill material in one pass, which risks uneven settlement later.
Skipping the sand cushion or the mechanical cover layer to save time on-site is one of the most common shortcuts taken on cost-pressured projects, and it's also one of the most expensive to fix later, since the failure only shows up when someone else digs into that alignment or when ground movement eventually damages an unprotected pipe.
Maximum Depth Requirements: Under Roads vs Open Ground
Depth requirements for buried cable conduit in India vary by voltage class, installation type, and whether the run passes under a road or stays in open ground.
For general low and medium voltage cable installations in open ground, the widely followed depth guidance is a minimum of around 75cm of cover for cables up to 1.1kV, increasing to around 1.2m for cables above 1.1kV, measured from finished ground level to the top of the cable or conduit. Where more than one tier of cable is laid, an additional allowance, commonly around 30cm per extra tier, is added to that base depth. If sand cushioning and protective covering aren't provided (which shouldn't happen on a properly specified installation, but the standard accounts for it), the required depth increases further as compensation for the lost protection.
Road and pavement crossings carry a stricter requirement, since the load from vehicle traffic above is far higher and more concentrated than open ground. Conduit crossing under a road is generally specified to a minimum depth of around 1m below the pavement surface, and the pipe itself should be laid at a slight skew to reduce the bend angle where the cable enters and exits the crossing, rather than cutting straight across at 90 degrees.
These figures are general guidance drawn from the standard code of practice for cable installation in India. Actual project depth requirements should always be confirmed against the specific client specification, local electricity board or highway authority rules, and any site-specific loading conditions, since these can be more conservative than the base standard depending on the project.
Rodent and Moisture Protection Underground
Two threats attack buried conduit continuously once it's in the ground: water finding its way in through any gap, and rodents that see an empty conduit run as a ready-made tunnel.
uPVC conduit has an inherent advantage here that metallic options don't. It's non-conductive and chemically stable, so it doesn't corrode the way GI or mild steel conduit does when exposed to prolonged ground moisture and soil chemicals. It also doesn't contain any plasticiser or organic material that attracts pests, which is a real factor in a country where rodent damage to underground cabling is a recurring maintenance issue.
That inherent resistance only holds up if the installation seals out the entry points properly:
- Every unused conduit end at a pull pit, panel, or termination point should be closed off with a proper end cap, not left open, especially if cables aren't being pulled through immediately after the conduit is laid. This is standard practice on infrastructure projects where conduit is laid months ahead of cabling. The full guide to uPVC conduit fittings covers end caps, bushings, and the fittings that matter most for underground and outdoor runs specifically.
- Joints should be solvent-cemented or properly socketed, never left as a loose push-fit, since any gap at a joint is both a water entry point and a gap large enough for smaller rodents to exploit.
- Bedding and backfill should be free of large voids around the pipe. Poorly compacted backfill leaves air gaps that both collect moisture and give rodents room to burrow along the conduit line.
Joint Sealing for Underground Conduit: A Mandatory Technique, Not an Option
Above ground, a loosely fitted joint is often a minor issue that gets caught during commissioning. Below ground, it's invisible until water has already tracked into the conduit and reached a termination point or a splice, sometimes years after installation.
Every joint in an underground conduit run needs to be a genuinely sealed connection, not a friction fit. Solvent cement jointing on uPVC conduit, done correctly with proper surface preparation and full socket engagement, creates a permanent, watertight bond rather than a mechanical connection that can work loose under ground movement or thermal expansion over time. This isn't an area where a faster, looser installation method is an acceptable trade-off for underground work, even where the same shortcut might be tolerated on a surface-mounted run that stays accessible for inspection.
Where a route needs directional changes, expansion allowance, or a transition between conduit types (uPVC to HDPE at a directional drilling section, for example), proper transition fittings rated for underground use should be specified rather than improvised joints. A single poorly sealed joint anywhere along a long underground run is enough to compromise the protection of the entire cable run downstream of it.
Conduit for Under-Road Cable Crossings: Sleeves vs Directional Drilling
Getting a cable across a road without disrupting traffic, or without the cost of resurfacing an entire carriageway, comes down to two main approaches.
Open-cut trenching with a protective sleeve involves cutting across the road, laying HMS uPVC conduit at the required road-crossing depth, backfilling and compacting in layers, and reinstating the road surface. This is the more straightforward and lower-cost method where traffic disruption is manageable and permissions for cutting the road are available. It's the standard approach for internal roads within townships, industrial campuses, and smaller site roads.
Horizontal directional drilling (HDD) avoids cutting the road surface entirely by boring a path underneath it and pulling conduit, typically HDPE because of its continuous coiled length and flexibility through the bore, through the drilled path. This method costs more per metre but avoids traffic disruption, avoids resurfacing costs on busy or arterial roads, and is often the only practical option where permissions to cut a live road simply aren't available.
The choice between the two usually comes down to road classification and permission constraints more than pure cost. Internal project roads generally favour trenched uPVC crossings for cost efficiency. Public arterial roads, highways, and any crossing where traffic disruption carries a real cost or permission barrier generally favour HDD with HDPE conduit.
Marking and Documentation of Underground Conduit Routes
The conduit that gets buried today becomes an invisible hazard for whoever digs in that area five or ten years from now, unless the route is properly marked and documented at the time of installation.
Good practice on Indian infrastructure and township projects includes:
- Physical route markers at regular intervals and at every change of direction, joint, or depth change, so the alignment is identifiable from the surface without excavation.
- Warning tape in the backfill, positioned well above the conduit but below finished grade, so any future excavation hits the tape and stops before reaching the pipe itself.
- As-built drawings recording actual depth, route, joint locations, and conduit specification for every section, not just the design intent. Actual installed conditions on-site frequently differ from the tender drawing, and only as-built records reflect what's genuinely in the ground.
- Handover documentation to the facility owner, utility, or maintenance team, including conduit size, grade, and material by section, so future maintenance or expansion work starts with accurate information instead of exploratory digging.
Skipping this step doesn't cause a failure on day one. It causes an expensive, avoidable failure years later when someone digs into an unmarked, undocumented conduit run with no record of what's there or how deep it sits.
Specifying for the Ground, Not Just the Cable
Underground conduit specification is a civil engineering decision as much as an electrical one. Getting the grade, bedding, depth, and sealing right at the time of installation is the only real quality control available, since none of it can be inspected or corrected once the trench is closed.
Trity Pipes manufactures HMS grade uPVC conduit pipes and fittings certified to IS 9537 Part 3, built for the load and durability demands of direct burial, road crossings, and infrastructure cable protection. For sizing guidance across a project's full cable schedule, the conduit pipe size chart for electrical wiring is a useful reference before finalising quantities. For bulk project supply and specification support on infrastructure, township, or solar EPC projects, reach out to the Trity Pipes team to discuss your route requirements.