Why Conduit Installation Quality Matters as Much as Cable Quality
Most site supervisors pay close attention to cable selection. The conduit protecting that cable often gets far less scrutiny.
This is a mistake. A high-grade armoured cable running through a crushed conduit offers no protection at all. A premium cable system installed with non-ISI conduit fittings will fail at the joint the first time it faces mechanical stress.
The Bureau of Indian Standards has addressed this with IS 9537 Part 3, which specifies standards for rigid uPVC conduits used in electrical installations across India. Every parameter in that standard exists because installation failures have real consequences: rewiring costs that run into lakhs of rupees, structural damage when conduits shift inside concrete, and fire risks that put lives at risk.
Conduit pipe installation is not just about running pipes through walls and slabs. A poorly installed conduit system creates expensive problems that surface months or years after the concrete is poured: burnt wires, blocked pipes, rewiring nightmares, and in worst cases, electrical fires.
In over a decade of supplying conduit systems to projects across India, we have seen the same mistakes repeated on site after site. Some are driven by cost pressure. Others come from outdated habits or inexperience. All of them are avoidable.
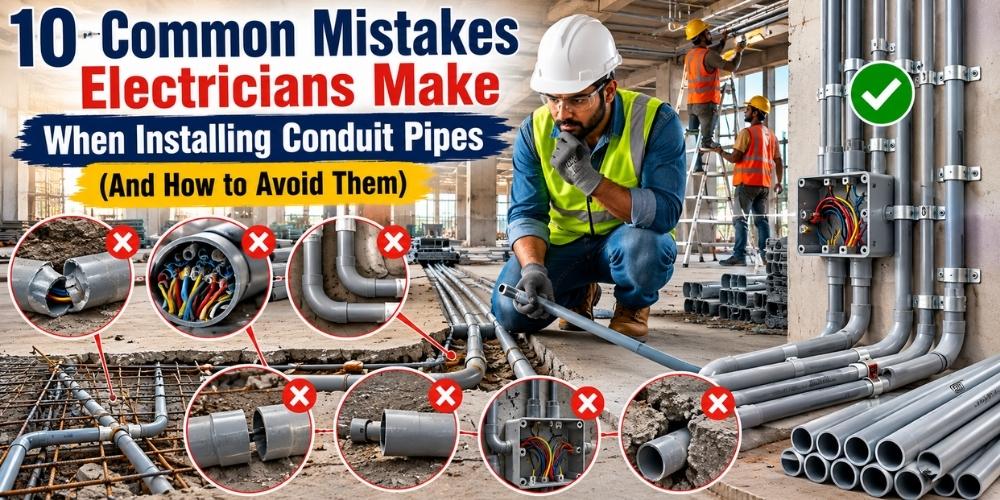
This guide covers the ten most common conduit installation mistakes and explains what happens when each one goes wrong.
Mistake 1: Using LMS Conduit Inside Concrete Slabs and Structural RCC Members
Light Series (LMS) conduit is designed for surface wiring and exposed indoor applications where the pipe faces minimal mechanical load. Using it inside RCC slabs is one of the most common and damaging mistakes on Indian construction sites.
When concrete is poured over LMS conduit, the compressive forces during pouring and curing can crush the pipe. Once the concrete sets, the conduit is permanently deformed. The result is a blocked raceway that cannot be used.
Correct practice: Always use Heavy Series (HMS) conduit inside concrete slabs, columns, and structural RCC members. HMS conduit is manufactured with greater wall thickness and tested for compressive strength under IS 9537 Part 3 specifications. Our uPVC electrical conduit pipes are available in Light, Medium, and Heavy duty grades. Confirm the correct duty rating with your structural engineer before procurement.
Mistake 2: Exceeding 40% Cable Fill Inside the Conduit
The National Building Code and standard electrical practice in India both recommend that cables should not occupy more than 40% of the internal cross-sectional area of a conduit.
Exceeding this limit creates three problems.
First, heat buildup. Cables generate heat during operation. When they are packed too tightly inside a conduit, heat cannot dissipate properly. Over time, insulation degrades, increasing the risk of short circuits.
Second, the cables become nearly impossible to pull during installation or replacement. Site teams sometimes cut corners here by overcrowding conduits, only to discover during pull-through that the friction is too great to complete the job.
Third, future upgrades become very difficult. A conduit at 40% capacity has room for additional cables. One at 80% or more is effectively closed for future expansion.
Correct practice: Calculate the required conduit diameter based on the cables being installed and the 40% fill rule before ordering material. Refer to the conduit size specifications listed on our uPVC electrical conduit pipes page to select the right internal diameter for your application.
Mistake 3: Installing More Than 360 Degrees of Bends in a Single Conduit Run
Every bend in a conduit run increases the friction a cable must overcome when being pulled through. The combined angle of all bends between two access points should never exceed 360 degrees (the equivalent of four 90-degree bends).
Exceeding this limit makes it physically impossible to pull cables through without damaging the cable insulation or the conduit itself. This is especially common in complex building layouts where electricians try to avoid additional junction boxes by adding extra bends.
The problem becomes critical during rewiring. What was difficult during initial installation becomes completely impossible once the cable has been in place for years.
Correct practice: Plan conduit routes before installation begins. If the route requires more than 360 degrees of total bend, introduce an inspection bend or pull box to break the run into manageable sections.
Mistake 4: Not Providing Inspection Bends or Pull Boxes on Long Conduit Runs
This mistake is closely related to the previous one but deserves separate attention. Even when the bend limit is respected, a conduit run that extends beyond 15 to 20 metres without an access point creates maintenance problems that will persist for the life of the building.
Blocked conduits, broken cables, and rodent damage to insulation are all problems that appear after handover. Without pull boxes or inspection bends at regular intervals, accessing these faults requires breaking open walls and slabs.
The cost of adding pull boxes during installation is negligible compared to the cost of structural repair during maintenance.
Correct practice: Install inspection bends or pull boxes every 10 to 15 metres on long horizontal or vertical runs. This is standard practice on commercial and institutional projects in India and is referenced in CPWD electrical specifications.
Mistake 5: Mixing Conduit Pipes and Fittings from Different Manufacturers
This is more common than it should be. Project procurement sometimes sources conduit pipes from one supplier and couplers, bends, or junction boxes from another, assuming the dimensions are interchangeable.
They are not always. Different manufacturers work to slightly different dimensional tolerances within the IS 9537 Part 3 framework. A coupling from Manufacturer A may not grip a pipe from Manufacturer B with the same force. Loose joints create entry points for water and dust. In concealed installations, these joints fail silently until a fault occurs.
Correct practice: Source all conduit pipes, bends, couplers, saddles, and junction boxes from a single manufacturer. This eliminates dimensional mismatch and ensures every joint performs as tested. Trity Pipes manufactures the complete range of uPVC conduit pipes and fittings as a matched system. See our full conduit product range for details.
Mistake 6: Choosing Non-ISI Conduit Pipes to Reduce Project Cost
Price-driven procurement is one of the leading causes of conduit failure on Indian construction sites. Non-ISI conduit pipes are widely available and often priced significantly lower than ISI-marked alternatives. The cost difference looks attractive during procurement.
The consequences appear much later. Non-ISI conduit pipes are typically manufactured with lower-grade PVC resin or with excessive calcium carbonate filler content, which reduces impact resistance and increases brittleness. On site, these pipes crack when bent, shatter on impact, and deform under the pressure of concrete pouring.
For a deeper understanding of how raw material quality affects conduit pipe performance, read our article on how resin and calcium percentage affect uPVC conduit pipe strength.
The service life of non-ISI conduit is also significantly shorter. UV exposure, temperature cycling, and the alkaline environment inside concrete all degrade substandard PVC far more quickly than virgin-grade uPVC.
Correct practice: Specify only ISI-marked uPVC conduit pipes complying with IS 9537 Part 3 in your procurement standards. Verify the BIS certification mark on pipes before accepting delivery. Our quality certifications are available for review.
| Factor | Non-ISI Conduit | ISI-Marked uPVC Conduit |
|---|---|---|
| Compression strength | Low, fails under RCC load | High, tested per IS 9537 Part 3 |
| Impact resistance | Brittle, cracks on-site | Tough, withstands handling |
| Fire behaviour | Variable | Self-extinguishing |
| Service life | 5 to 10 years typical | 25 to 50 years typical |
| Safety risk | High | Minimal when installed correctly |
Mistake 7: Not Securing Conduits Properly Before Concrete Pouring
Conduit pipes laid loose on reinforcement bars before pouring will shift when wet concrete is poured and vibrated. Even a displacement of a few centimetres can mean a conduit outlet no longer aligns with a switch box or fan point.
On larger pours, unsecured conduits can cluster together or float upward in the wet concrete. When the slab sets, sections of the conduit may be completely blocked by concrete intrusion at joints that opened during pouring.
Correct practice: Bind conduits to reinforcement bars with wire ties at intervals of not more than 600mm. Use PVC saddle clips where conduits run along formwork surfaces. Check alignment before pouring begins and after the first pour layer to confirm nothing has shifted. This is a standard requirement in CPWD electrical specifications for government projects.
Mistake 8: Skipping Solvent Cement on Conduit Joints
Solvent cement creates a chemical bond between the pipe and fitting that is stronger than either material alone. Skipping it, or applying it incorrectly, leaves a joint that is mechanically connected but not sealed.
The consequences accumulate over time. Moisture enters the conduit through unsealed joints and corrodes cable insulation. Fine construction dust in freshly poured slabs enters the pipe during installation, blocking the route before any cable is pulled. In underground or wet zone installations, water ingress through dry-fitted joints can cause persistent faults that are extremely difficult to trace.
Correct practice: Apply a light coat of uPVC solvent cement to both the pipe end and the inside of the fitting before pushing the joint home. Rotate the pipe slightly after insertion to ensure even distribution of the cement. Allow the joint to set for the time specified by the cement manufacturer before pulling cables.
Mistake 9: Selecting Conduit Pipes That Are Too Small
Selecting the minimum conduit size for the current cable requirement is a short-term saving that creates a long-term problem. Electrical loads in buildings consistently increase over time. New circuits, additional circuits, upgraded equipment, and changes in occupancy all create demand for additional cables.
A conduit that is full today cannot accommodate tomorrow's needs. When the building owner needs an additional circuit, the only options are to run surface conduit (which looks poor in a finished interior) or to cut open walls and replace the buried conduit entirely (which is expensive and disruptive).
Correct practice: Size conduit at least one diameter larger than the minimum required by the current cable schedule. This adds minimal cost during installation and avoids the much larger cost of future retrofitting. Our team can assist with conduit sizing for specific applications. Contact us for technical support.
Mistake 10: Not Labelling Junction Boxes
Junction boxes without labels create real problems during maintenance, fault finding, and building upgrades. An unlabelled junction box in a ceiling void or behind a false panel can add hours to a simple fault-finding exercise.
On large commercial projects like hospitals, schools, and offices, the time cost of navigating an unlabelled electrical system is significant. For facilities that need to maintain uptime, such as hospitals and data centres, delays in fault isolation have operational consequences beyond the repair cost.
Correct practice: Label all junction boxes during installation with circuit designation, panel reference, and floor or zone information. Use permanent markers or printed labels. On commercial projects, include this requirement in the electrical installation specification so it is enforced from the beginning.
Common Mistakes Summary: Quick Reference Tables
Mistake, Consequence, and Correct Practice
| Mistake | Consequence | Correct Practice |
|---|---|---|
| LMS conduit in RCC slabs | Crushed pipe, blocked raceway | Use HMS conduit in all structural members |
| Cable fill above 40% | Overheating, failed pull-through | Calculate fill ratio before ordering conduit |
| More than 360 degrees total bend | Cables cannot be pulled | Limit bends and add pull boxes |
| No pull boxes on long runs | Blocked cables, inaccessible faults | Install access points every 10 to 15 metres |
| Mixing manufacturers | Loose joints, water ingress | Use a single matched conduit system |
| Non-ISI conduit | Cracking, brittleness, fire risk | Specify ISI-marked IS 9537 Part 3 conduit only |
| Unsecured conduit before pouring | Displacement, blocked pipes | Bind to rebar at 600mm intervals |
| No solvent cement on joints | Moisture and dust ingress | Apply solvent cement to all joints |
| Undersized conduit | No room for future cables | Size one diameter above minimum requirement |
| Unlabelled junction boxes | Maintenance delays, higher costs | Label all boxes at installation |
Poor Practice vs Long-Term Cost Impact
| Poor Installation Practice | Long-Term Cost Impact | Professional Recommendation |
|---|---|---|
| LMS conduit in concrete | Full slab break-out for rewiring | Always use HMS in structural concrete |
| Non-ISI conduit | Premature failure, full rewiring | Specify ISI-marked, virgintrade uPVC only |
| Overcrowded conduit | Rewiring from scratch, fire risk | Follow the 40% fill rule rigorously |
| Dry-fitted joints | Fault tracing costs, cable replacement | Apply solvent cement to every joint |
| Undersized conduit | Surface conduit retrofitting, wall cutting | Add one size headroom at design stage |
Why ISI-Marked Conduit Pipes Prevent Most Installation Failures
The majority of the failures described in this article are prevented or significantly reduced by using ISI-marked uPVC conduit pipes that comply with IS 9537 Part 3.
IS 9537 Part 3 sets minimum requirements for dimensional accuracy, wall thickness, impact resistance, compressive strength, heat deflection, and fire propagation. A pipe that carries the ISI mark has been tested against all of these parameters by a BIS-accredited laboratory.
In practice, this means:
The pipe wall is thick enough to resist crushing under RCC loads when the correct grade is specified. The dimensions are consistent from batch to batch, ensuring fittings from the same manufacturer engage correctly. The material self-extinguishes if a flame is removed, reducing fire propagation risk. The inner bore is smooth enough to allow cable pulls without damaging insulation.
None of these properties are guaranteed in a conduit pipe that has not been tested and marked under IS 9537 Part 3.
Recommended Conduit Grades by Project Type
| Project Type | Recommended Conduit Grade | Key Reason |
|---|---|---|
| Residential apartments, villas | Medium duty (HMS for slabs, LMS for surface) | Balance of cost and performance |
| Commercial offices | Medium to Heavy duty throughout | Frequent rewiring needs |
| Hospitals | Heavy duty throughout | Reliability, life-safety circuits |
| Schools | Medium duty minimum | Long service life required |
| Warehouses | Heavy duty surface conduit | Mechanical damage exposure |
| Industrial plants | Heavy duty, corrosion-resistant | Harsh environment, chemical exposure |
| Infrastructure projects | Heavy duty, ISI-marked mandatory | Regulatory and tendering requirements |
Site Inspection Checklist Before Concrete Pouring
Use this checklist before authorising any slab pour where conduits are embedded:
- Confirm all conduit pipes are the correct grade (HMS for RCC, as specified in drawings).
- Verify all joints have been solvent-cemented and set.
- Check that no conduit run has more than 360 degrees of total bend.
- Confirm conduits are tied to reinforcement at maximum 600mm intervals.
- Verify pull boxes are installed on runs exceeding 10 to 15 metres.
- Check that no conduit is touching or overlapping with adjacent conduits at the pour interface.
- Confirm all conduit ends are capped or plugged to prevent concrete intrusion.
- Verify that conduit outlets align with planned switch, socket, and luminaire positions.
- Check that junction boxes are installed at the correct height and orientation.
- Ensure all junction boxes are labelled with circuit and panel references.
Best Practices Followed by Professional Electricians
Experienced electrical contractors in India who consistently deliver reliable installations follow a few common principles.
They plan conduit routes before any other work begins, marking routes on structural drawings and resolving clashes with plumbing and HVAC at the design stage rather than on-site.
They specify the complete conduit system from one manufacturer at the procurement stage, including pipes, bends, couplers, boxes, and saddles.
They verify ISI certification on every batch delivery, not just at the first order. Substandard pipes sometimes appear partway through a project when original stock is exhausted and replacements are sourced quickly.
They maintain a written record of all buried conduit routes with measurements from fixed reference points, so future maintenance teams can locate routes without opening walls.
Frequently Asked Questions
What is the correct conduit grade for use inside RCC slabs in India?
Heavy Series (HMS) conduit complying with IS 9537 Part 3 should be used inside all RCC slabs, columns, and beams. Light Series conduit is not rated for compressive loads and will crush under the weight of fresh concrete and structural loading.
How do I check if a uPVC conduit pipe is ISI-marked?
Look for the ISI mark stamped or printed on the pipe body along with the IS 9537 Part 3 designation and the manufacturer's licence number. Verify the licence number against the BIS website if required for project documentation.
What happens if solvent cement is not applied to conduit joints inside concrete?
Unsealed joints allow moisture and dust to enter the conduit. In structural concrete, this can cause cable insulation degradation, tracking faults, and intermittent failures that are very expensive to diagnose and repair.
How many 90-degree bends can I have in a single conduit run?
No more than four 90-degree bends, giving a total of 360 degrees, between any two access points such as a pull box or inspection bend. Beyond this limit, cable cannot be pulled without risking damage to insulation.
What is the maximum cable fill for a conduit in India?
Standard practice and the National Building Code recommend a maximum of 40% cable fill by cross-sectional area. This ensures adequate heat dissipation during operation and provides room for future cable additions.
Looking for reliable ISI-certified uPVC electrical conduit pipes for your next project? Contact Trity Pipes today for expert guidance, premium quality products, and bulk pricing for builders, contractors, and electrical professionals.